Discover how easy it is to start your first project with AIDDA! This step-by-step guide walks you through the process of creating a new interior design project, from entering your ideas and selecting styles to generating visuals and refining your designs. Whether you’re a professional architect or someone with a creative vision, this article will show you how to turn your ideas into stunning, AI-powered visuals with just a few clicks. Start creating with confidence and bring your vision to life!
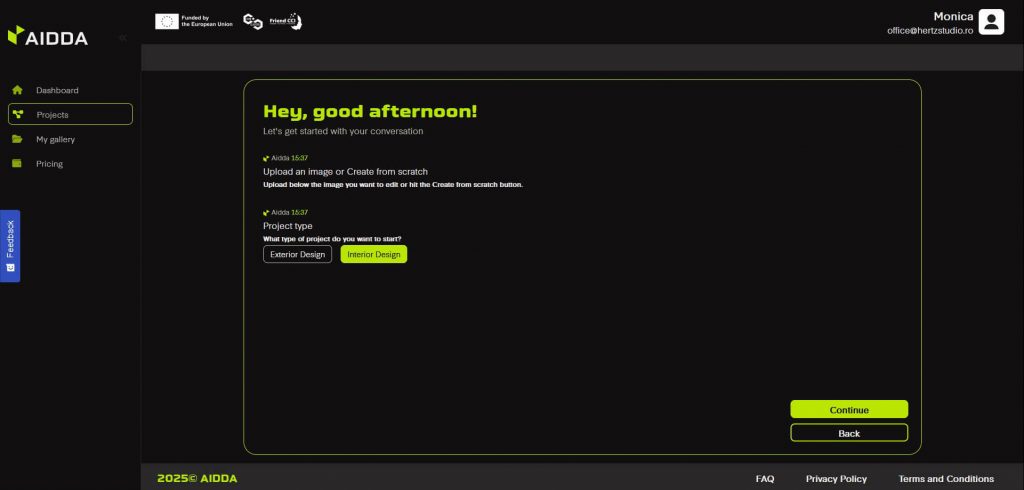
Step 1: After creating an account, click New project in your dashboard.
Step 2: Start by clicking Create from scratch.
Note: This example is a project from scratch. You can find the guide on how to create a design starting from an image here: https://aidda.ai/guide/design-starting-from-an-image-step-by-step-guide/

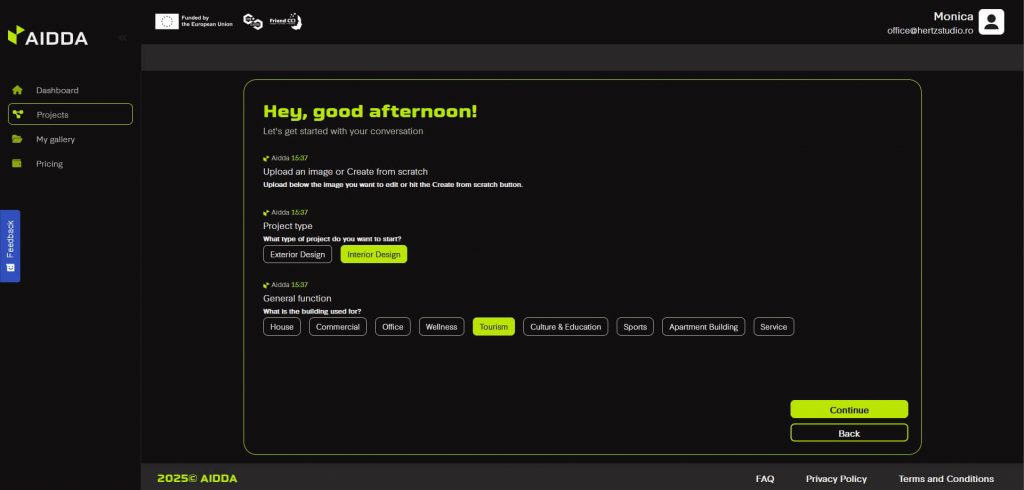
Step 3: Next, choose Interior Design.
Note: This example is an interior design project. You can find the guide on how to create the exterior design of a building here: https://aidda.ai/guide/exterior-design-step-by-step-guide/
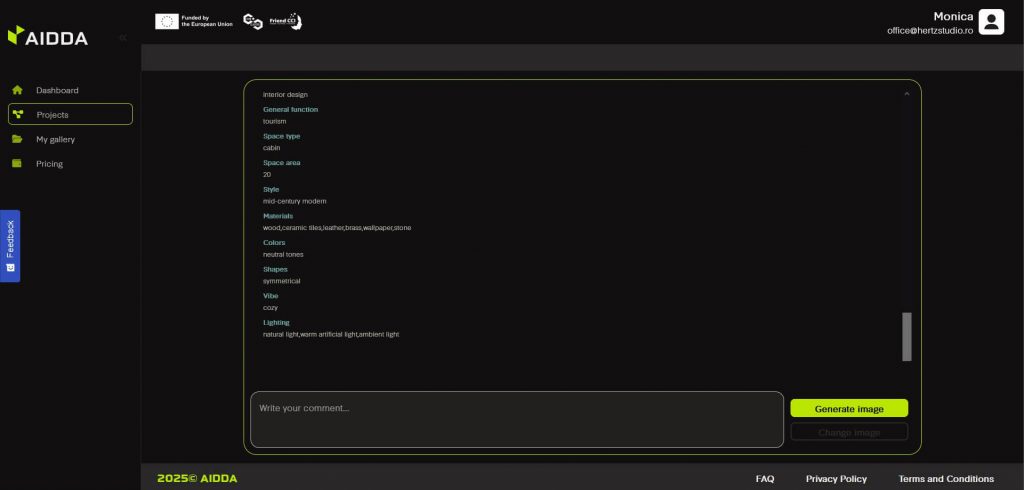
Step 4: Pick the General function of the building.
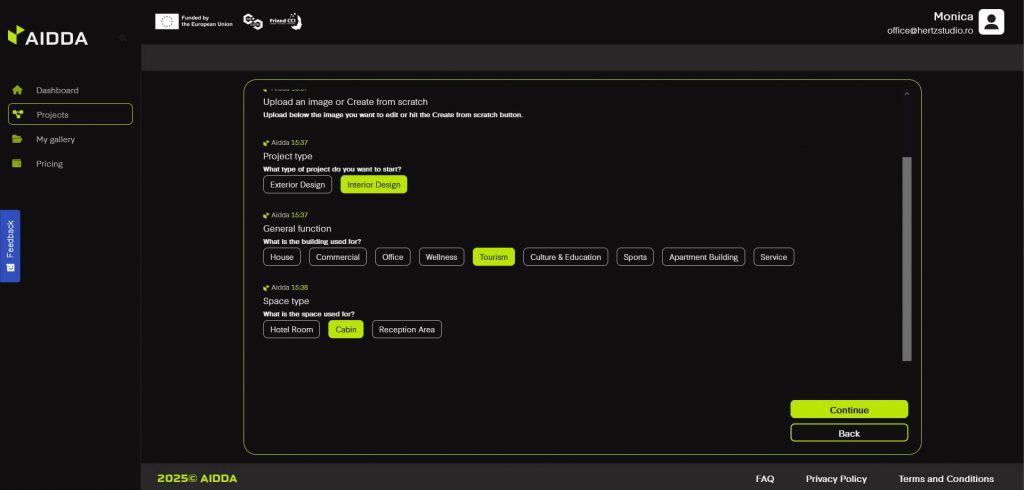
Step 5: Pick the Space type.
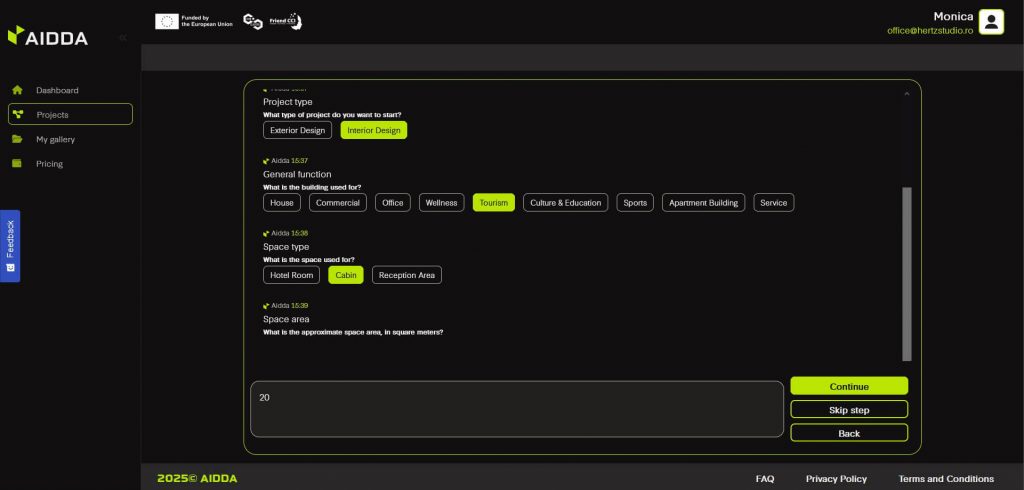
Step 6: Write the Space area in square meters or Skip step.
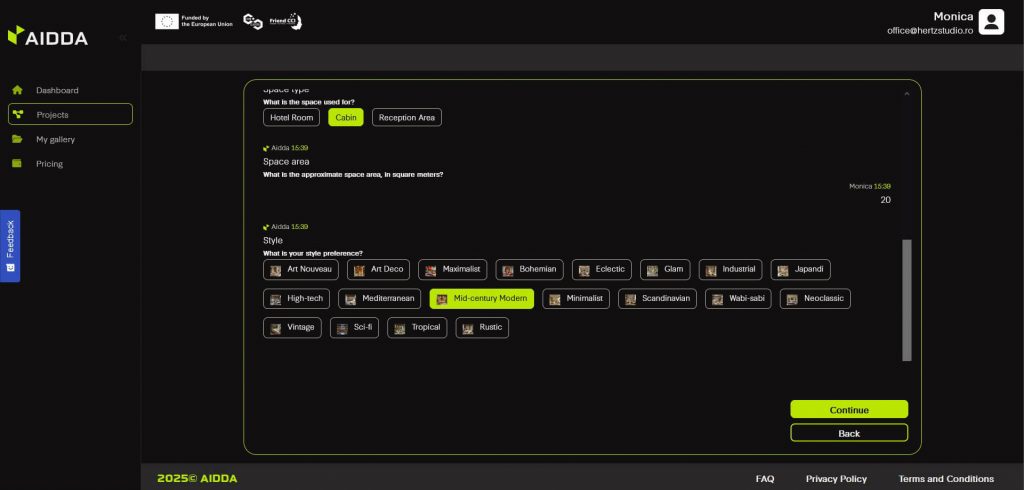
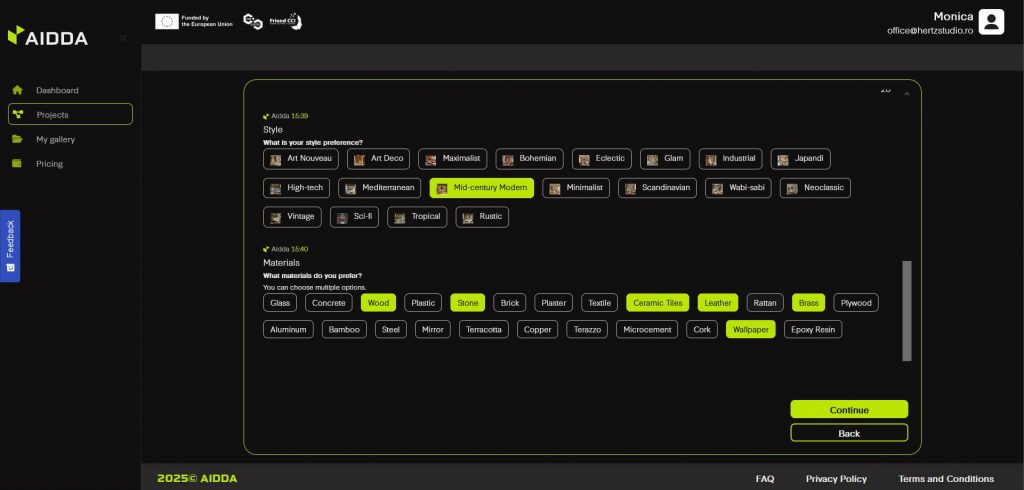
Step 7: Pick the Style. Each option has a thumbnail that you can click on to see an image that illustrates that style.
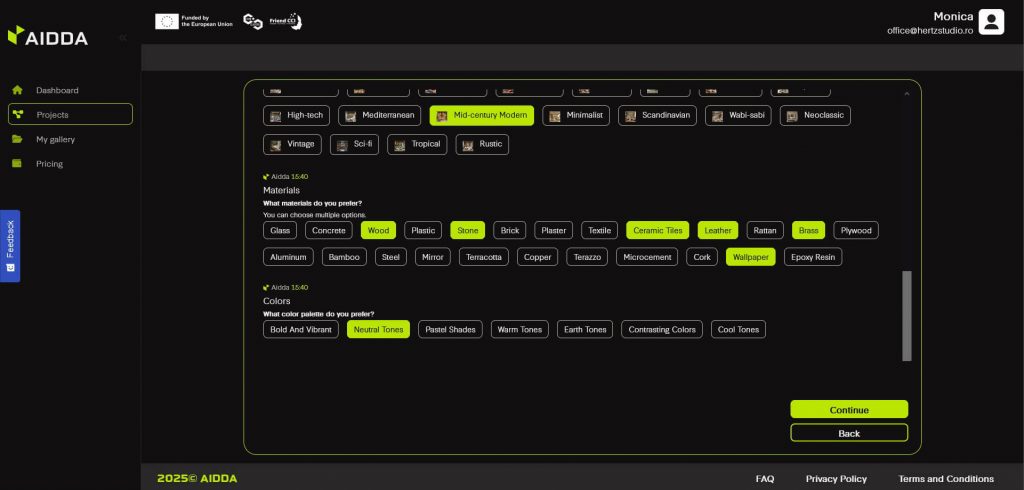
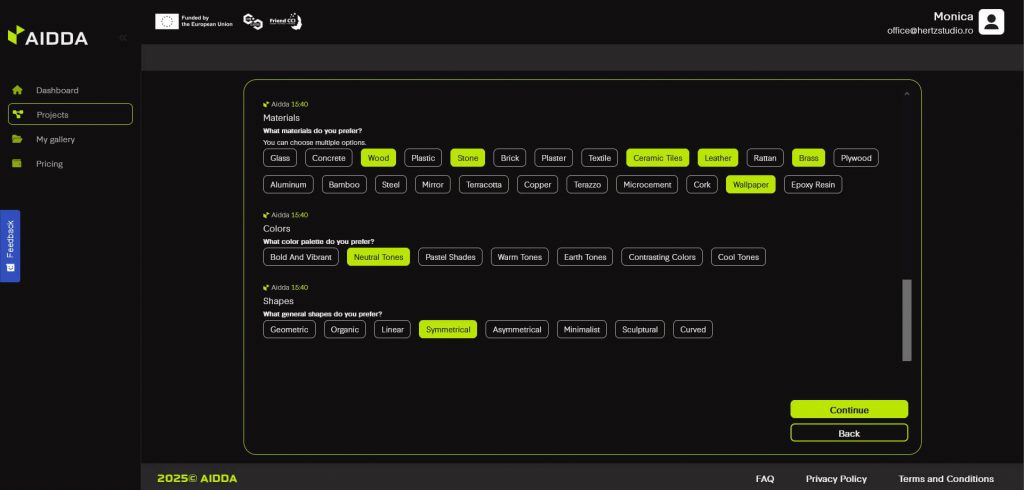
Step 8: Pick your preferred finishes by choosing from our list of Materials. This is a multiple choice step.
Step 9: Pick the Colors that best characterizes your project.
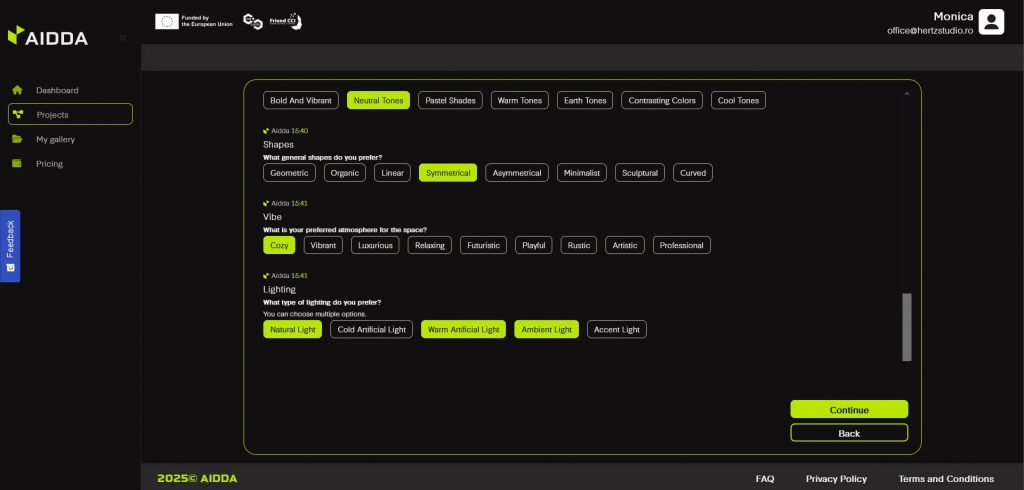
Step 10: Pick the Shapes that you prefer for this design.
Step 11: What about the Vibe of your project? Pick one as well.

Step 12: This multiple-choice step lets you choose the Lighting.
Step 13: Add more details in the Free input text field or skip this step. Learn how to write better prompts from our guide: https://aidda.ai/guide/how-to-write-better-prompts/

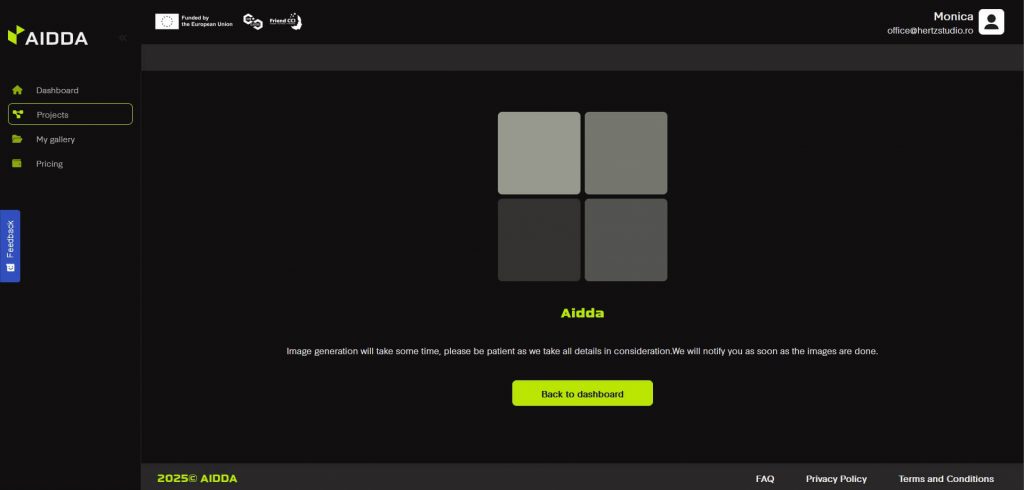
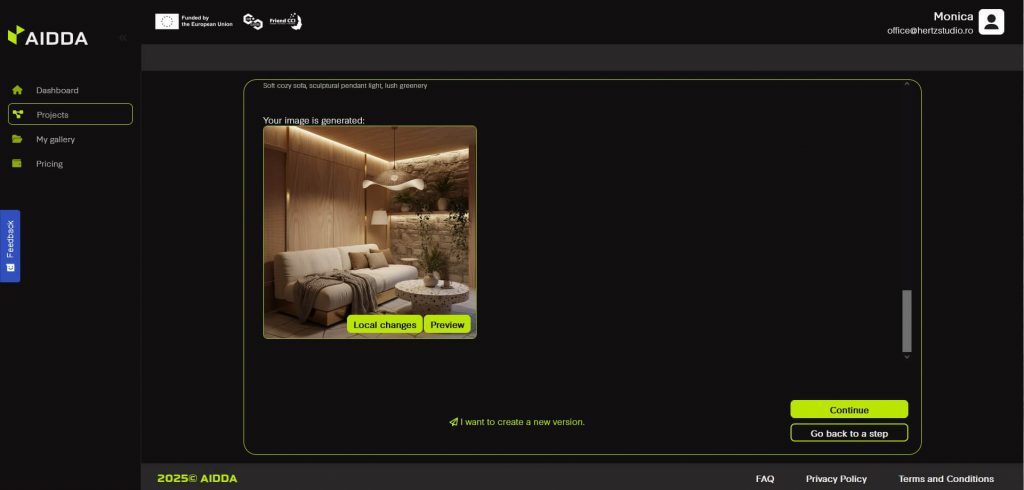
Step 14: Hit Generate image and wait a little for the magic to happen.
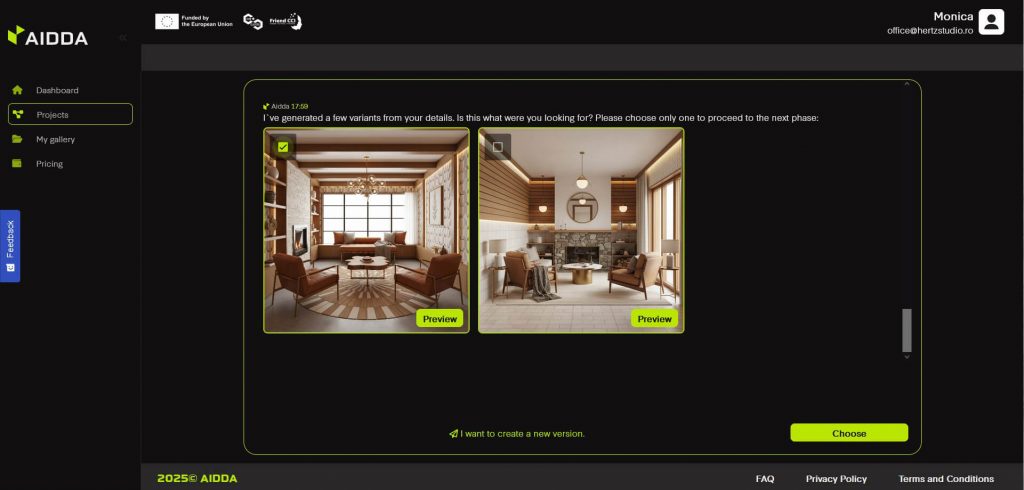
Step 15: Once your images are ready, you have multiple options:
WORKFLOW 1
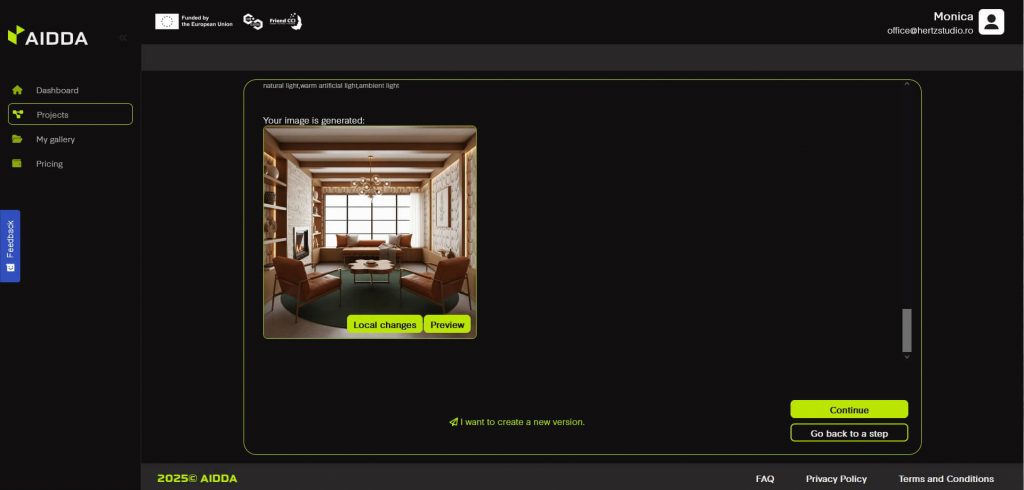
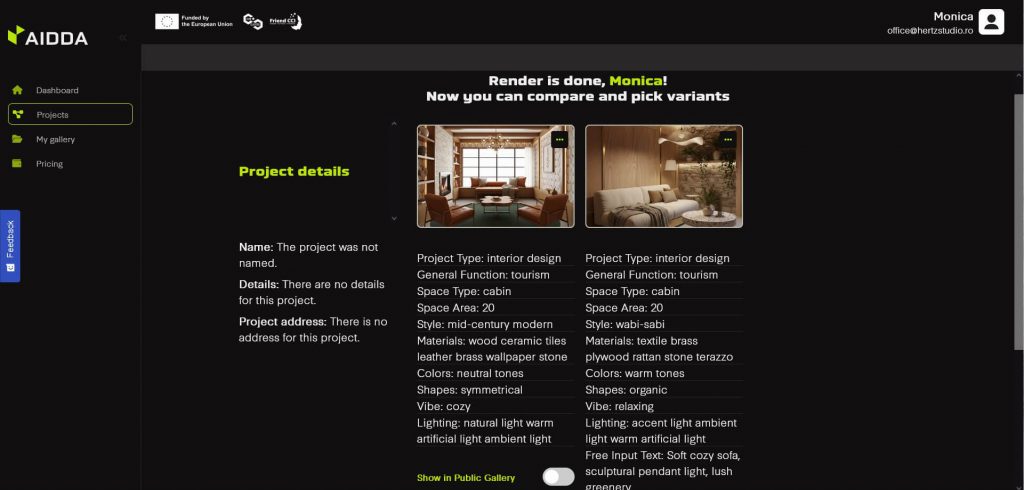
If you LIKE one of the designs, you can select it and hit Choose. Next, you have several options:
- You can make changes to the image by hitting the Local changes button, then writing a prompt about the changes you want and hit Create changes. This will generate a modified version of the image you chose before.

- You can create a new design by hitting I want to create a new version. This will take you back to the beginning of the process and you will be able to make all choices again.
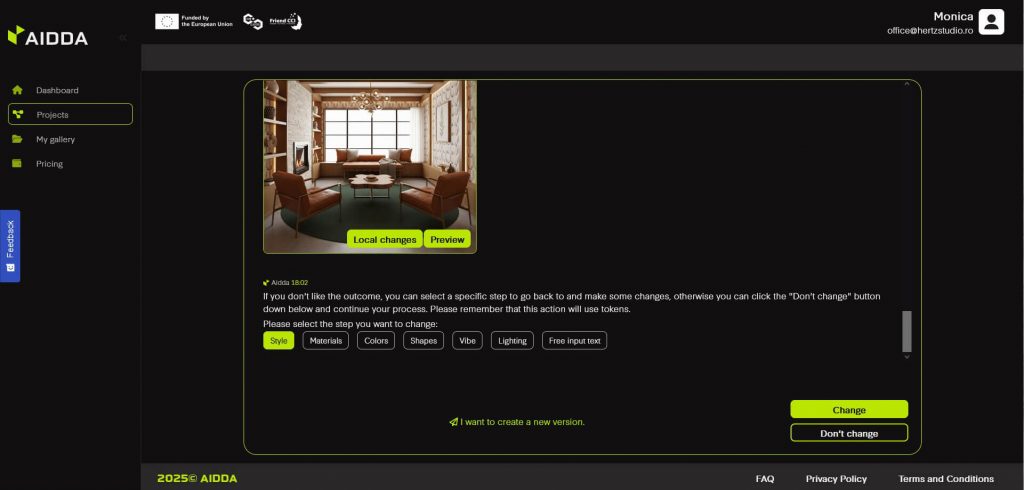
- You can go back to a specific step in the project creation process by hitting Go back to a step and choose the step you want. This way, you get to choose the step you want to go back to and then make new choices for all the questions that follow that step.
WORKFLOW 2
If you DON’T LIKE either of the designs, you can hit I want to create a new version. This will take you back to the beginning of the process and you will be able to make all choices again.
By having these options, you can create different versions for the same project.
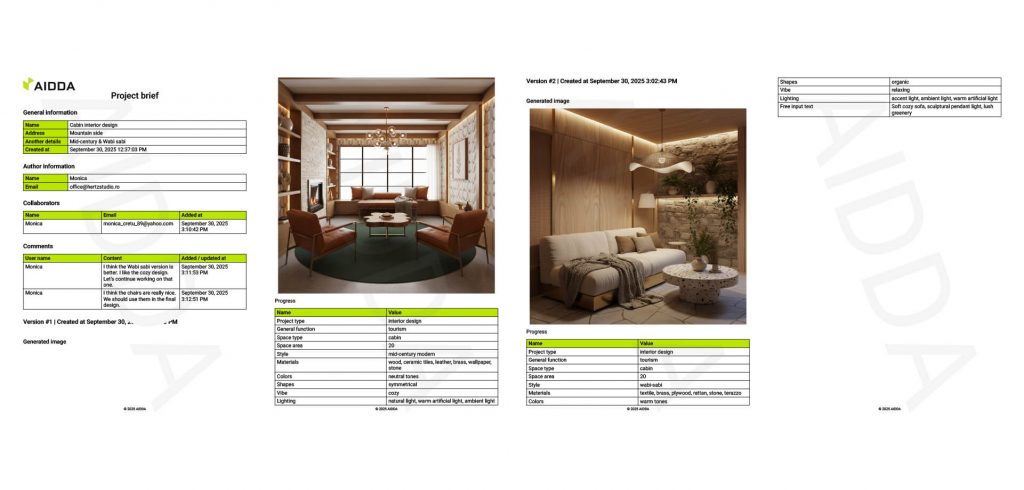
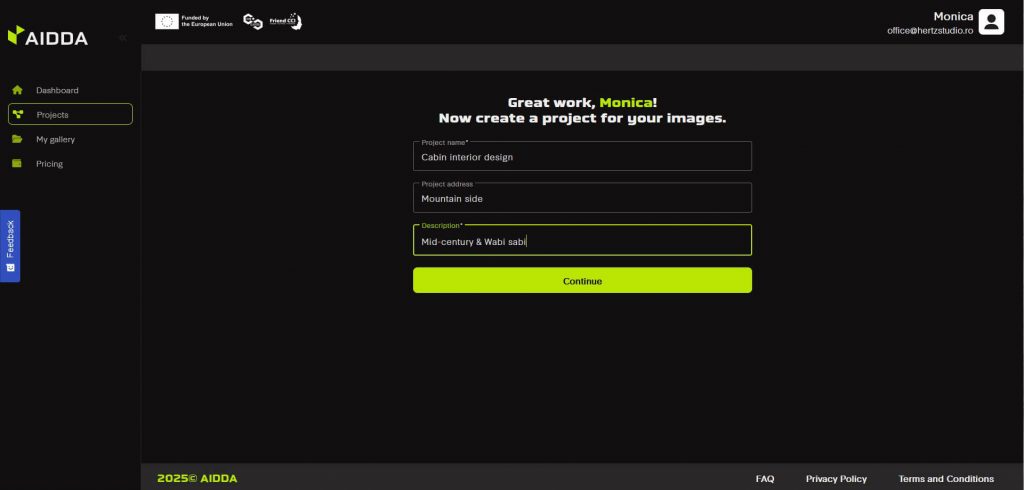
Step 16: Once you are satisfied with the result, you can add project details: name, address and description. The project will include all design you created in the session.
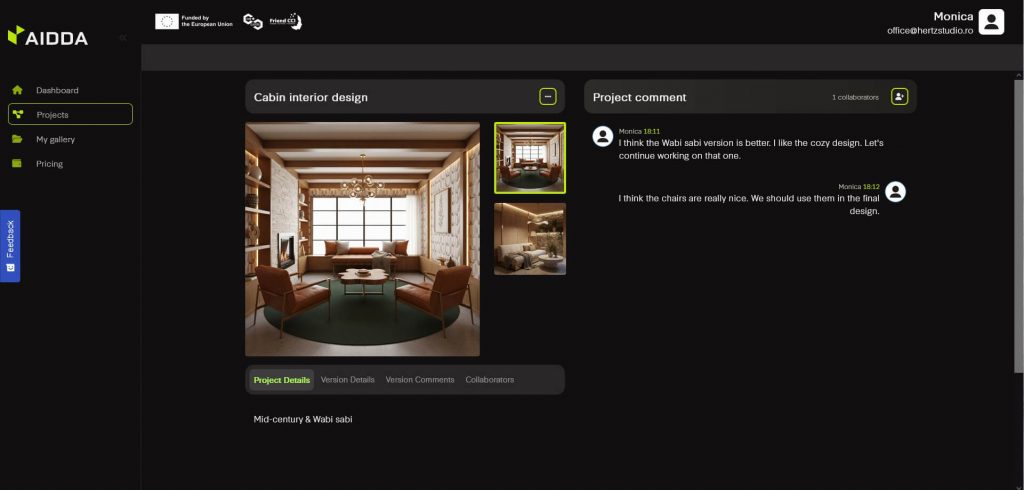
Step 17: Collaborate
AIDDA makes collaboration easy. Share your project with clients, colleagues, or stakeholders to gather feedback by simply adding their email.
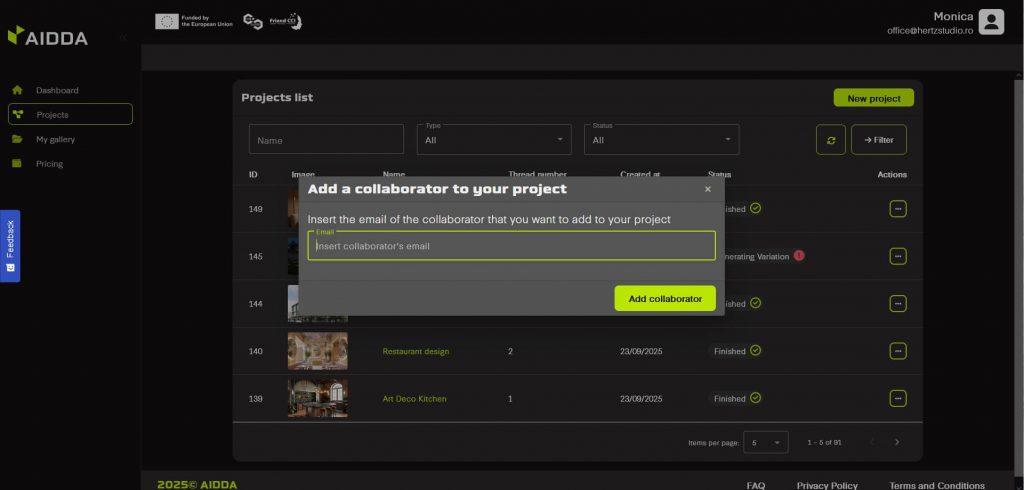
Once they accept your request and make a free account, they will be able to see the project you invited them to collaborate on in their dashboard. Then, you can all start adding comments in the platform while being able to browse and compare all project versions.
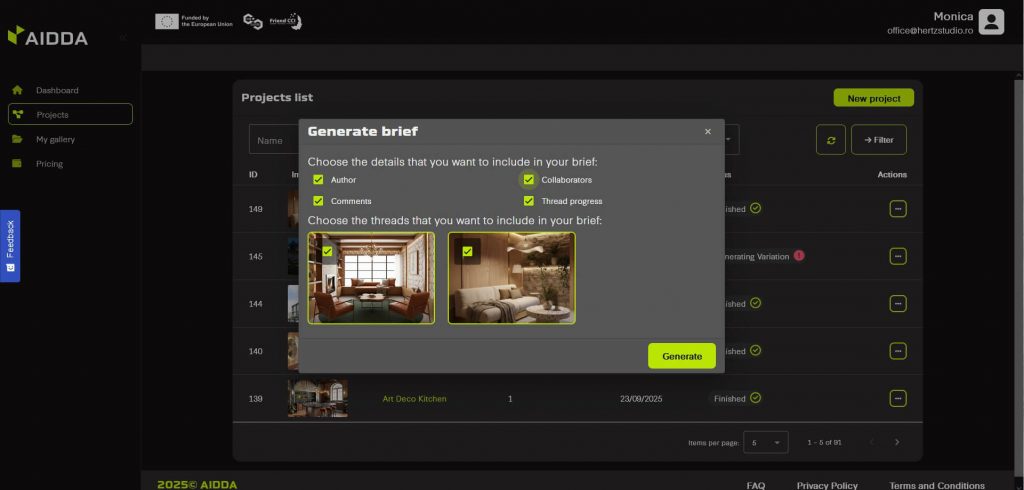
Step 18: Generate project brief
At any time, you can generate a brief of the project. You can choose what to include in it: comments, versions, collaborators and so on, and AIDDA will generate for you a complete history of your project, including all the choices you’ve made in the project generation phase.