Welcome to AIDDA, your AI-powered assistant for architectural design and collaboration! Whether you’re an architect, designer, or client with a creative vision, AIDDA makes it easy to turn ideas into visual reality. This guide will walk you through the steps to get started and make the most of the platform.
Step 1: Create your account
The first step in your AIDDA journey is setting up your account. Follow these simple steps to get started:
- Visit www.aidda.ai.
- Click the Launch App button at the top right corner.
- If you don’t already have an account, hit Register.
- Fill in your details:
- Name
- Email address
- Password
- Confirm password
- Click Continue your email for a confirmation link and click to activate your account.
💡 Tip: Use a professional email address if you’re an architect or designer to streamline collaboration with clients or teams.
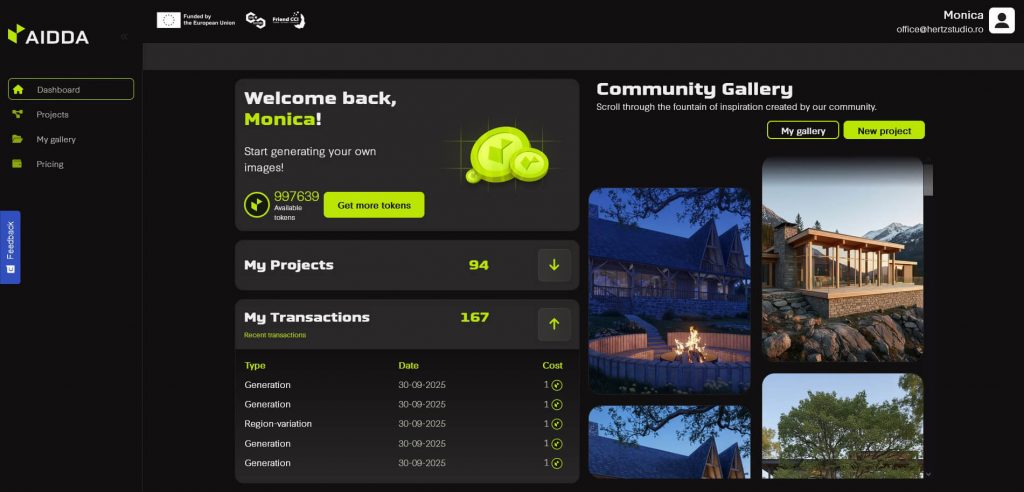
Step 2: Explore the dashboard
On the left side, you can access directly the main areas of the platform: Dashboard, Projects, My Gallery and Pricing. The dashboard is your command center, giving you access to all of AIDDA’s features. Here’s what you’ll find:
- Get more tokens: This button takes you to the payment area, which you can also access from the “Pricing” section
- My Projects: Access and manage all your ongoing and completed designs.
- My Transactions: Her’s a track record of all your interactions with the platform.
- New Project: Start a design project from scratch.
- My Gallery: Access designs you previously created; you can access your images in the dedicated section as well.
- Pricing: Access info regarding the token packages you can purchase.
Take a few minutes to familiarize yourself with the layout.
Step 3: Create your first project
Ready to start designing? Follow these steps to create your first project:
- Click the New Project button on the dashboard.
- If you have an image (rendering, photo) you want to start your design from, you can upload it OR you can start from scratch.
- If you start your design from scratch, you can next choose from Exterior design or Interior design.
- Follow the next intuitive steps. Once you’ve made a choice, hit Continue. If you changed your mind, you can go Back to the previous step. Keep in mind that some steps are multiple choice, so pay attention to the instructions.
- Customize your prompt by describing your design vision in the Free input text step or skip this one.
- Hit Generate image to see AIDDA bring your vision to life.
- Once your images are ready, you have multiple options:
- You can choose your favorite option
- You can make local changes to your selected image
- You can create a new version
- You an go back to a specific step that you get to choose from a list
- By having these options, you can create different versions for the same project. Once you are satisfied with the result, you can add project details: name, address and description.
💡 This iterative process allows you to fine-tune the design until it matches your vision. Check our dedicated design guides for more detailed instructions.
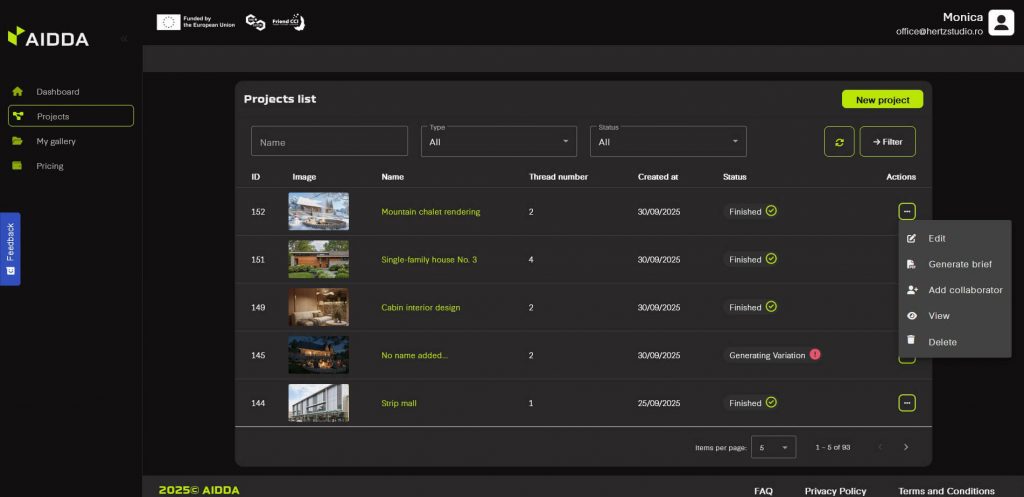
Step 4: Manage your projects
The Projects section can be accessed through the Dashboard or directly on the left side of the screen. Here you’ll find a list of all your projects and you can search filter the by type or status. If you click on the three dots in the right, you have different options for each projects:
- Edit project details
- Generate brief
- Add collaborator
- View
- Delete
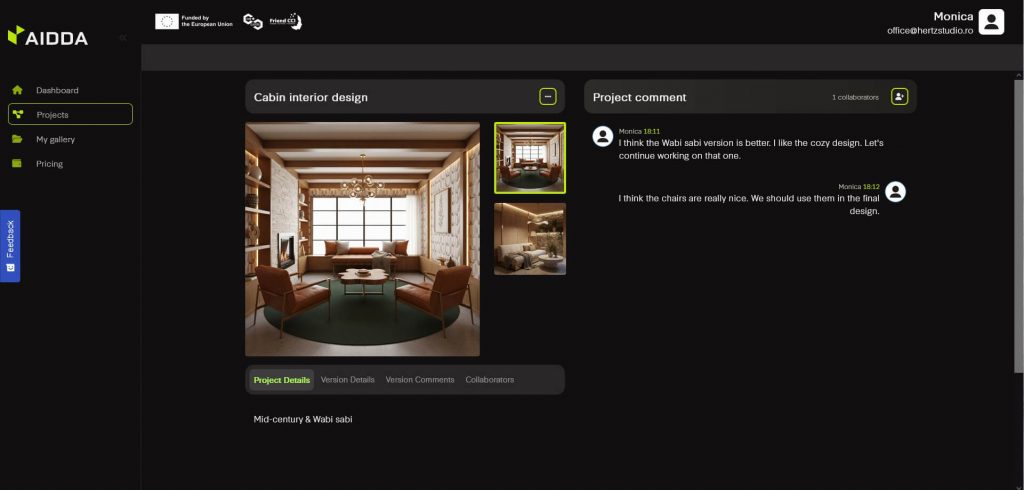
Step 5: Collaborate and share
AIDDA makes collaboration easy. Share your project with clients, colleagues, or stakeholders to gather feedback by simply adding their email.
Once they accept your request and make a free account, they will be able to see the project you invited them to collaborate on in their dashboard. Then, you can all start adding comments in the platform while being able to browse and compare all project versions.
Step 6: Generate brief
At any time, you can generate a brief of the project. You can choose what to include in it: comments, versions, collaborators and so on, and AIDDA will generate for you a complete history of your project, including all the choices you’ve made in the project generation phase.
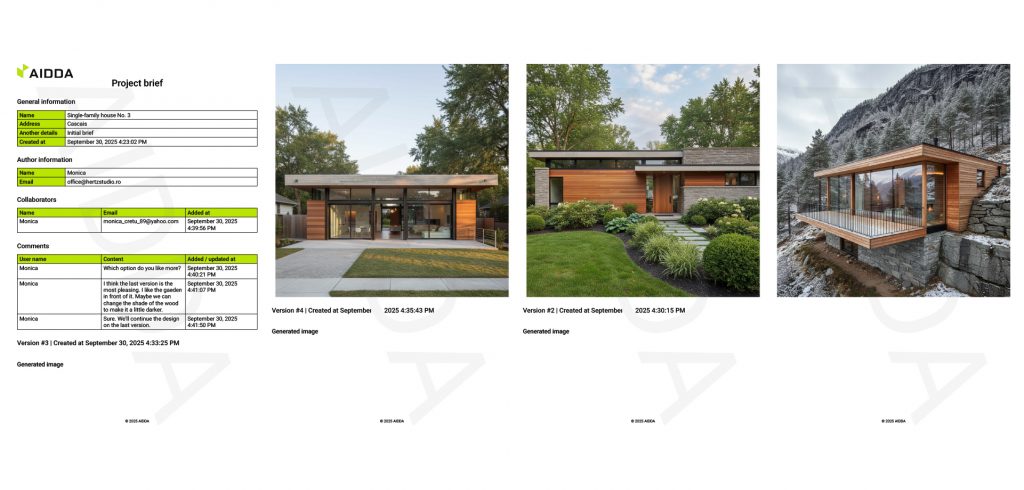
💡 This is a great start for any project you set your mind to and you can easily get on the same page with anyone else involved!